Despite its rack-mounting eight-port 1U form factor, the Watchguard Firebox X750e Core is an old-fashioned 32-bit x86-based product. Our unit came with one 512 MB stick of RAM, which we upgraded to 2 GB (two 1 GB sticks) only to find out that the CPU seems to be able to address only 1.5 GB (this is how much RAM is reported at boot). So the sweet spot for RAM upgrade is probably 1 GB, single- or dual-channel. Some people reported successes in upgrading the CPU, but we decided not to mess around with it.
We suspect the approach presented here should also work on related models, X550e and X1250e, but we have not tested it on those.
The Plan
At the outset, the only way to boot this box is from a CF (Compact Flash) card located inside the case. Moreover, the current BIOS is extremely picky; it would not accept a card larger than 128 MB (some people say 256, but this was not our experience; it might depend on hardware revision and/or the version of BIOS). Even worse, something (either BIOS or the boot loader) seems to be somehow force-wed to Fireware, the manufacturer's OS. Our attempts to create hybrid boot media (leaving the existing boot loader in place while substituting the actual kernel and OS with OpenWrt) ended in frustration; the Firebox just wouldn’t boot OpenWrt, nor would it give us any indication of what we might be doing wrong.
So the plan is to do two things, (1) upgrade the BIOS to the point where it can deal with larger CF cards and operating systems other than Fireware, and (2) make a CF card with OpenWrt on it and boot the unit off it. To pull this off, we will need an extra CF card (we want to preserve the original firmware just in case) and a way to get into the Firebox via its COM interface (we used a COM-to-USB cable).
Part One: BIOS
First, get a CF card that is 128 MB or smaller. We had a 128 MB card lying around, but something as small as 16 MB should do the trick just as well.
Next, point your browser here:
https://sites.google.com/site/pfsensefirebox/
This is a site that some nice (and technically adept) person had set up back when pfSense had a 32-bit version. It has all the BIOS voodoo that we need. Download two files, FreeDOSBios2.img.gz and XEBIOS_81.BIN. The first file is an image of a FreeDOS drive with some utilities on it, the second, the actual BIOS to which we need to upgrade. You may want to rename the BIN file so that its name is eight characters or shorter (we went with XEBIOS81.BIN). This is not required though; FreeDOS has ways of transforming long file names to conform to the 8+3 format.
Next, burn the image onto the CF card (we did it with Rufus on a Windows machine, but there are plenty of other programs you can use). When done, access the drive, navigate to the directory called BIOS, and copy the BIN file there (there will be a few of those already, so it will be in a good company).
Now, open the case of the Firebox (if you haven’t already), remove the stock CF card and put in the one you just made. Technically, this will void your warranty, but since the box is already past its end of life, there is no warranty to speak of anyway.
Next, connect your Firebox to your computer. In our case, we had a cable connecting the COM port on the Firebox to a USB port on a Linux computer. we used a command-line utility called screen. It requires root privileges to run, so here’s the command we used:
sudo screen /dev/ttyUSB0 9600This can also be done with Putty on Windows or Linux. Set up a serial connection in the Connection >> Serial part of Putty’s settings window as follows:
- Speed: 9600
- Data bits: 8
- Stop bits: 1
- Parity: None
- Flow control: None
One way or another, we now have a way to connect to the Firebox at a blistering 9600 bits per second (yes, we are being funny). Start the connection, then turn on the Firebox. It will hum for a time, then beep once (meaning, memory test complete), then hum some more, then beep three times (meaning, FreeDOS has booted up). At that point, we should see the old-timey DOS prompt (C:) in the terminal window.
Change to the BIOS directory by typing:
cd biosNow see if your software can communicate with the BIOS. Type:
biosidIf everything is right, there will be some output, including BIOS ID.
Just in case, start by making a backup copy of the existing BIOS:
awdflash /pn /sy MYBACKUP.BIN /eNOW, ATTENTION: HERE BE DRAGONS!!!
Apparently, not all BIOS varieties used by Watchguard can survive this procedure, but we don’t know which ones can and which ones can’t. Even worse, we didn’t write down “our” BIOS ID. So there is a non-zero chance that you will ruin your BIOS and brick your Firebox at this stage. Proceed at your own risk or search the Internet for additional information.
You could get lucky and be able to update your BIOS in one go. In our case, we had to do a stepwise update. First, we updated BIOS to version 7.5:
awdflash X750EB7.BIN /py /sn /cc /eThen, we had to restart the Firebox so that it could boot with the BIOS version 7.5. When the Firebox boots, its small LCD screen will show, among other things, characters B7, indicating that BIOS has been updated to some version that starts with 7.
After that, we came back to the BIOS directory and updated the BIOS to version 8.1 (remember, we renamed our BIOS file after downloading it; yours may be named differently):
awdflash XEBIOS81.BIN /py /sn /cc /eReboot again, and if everything went well, LCD output will include B8, meaning, we have BIOS version 8-something. Turn off your Firebox and close the console connection on your computer. If you use screen, press Ctrl-a, then k. A line of text will appear on the bottom of the screen asking you whether you really want to kill the innocent session; press y, you vicious monster. If you use Putty, simply close the terminal window.
Next, open a new console connection; this time, set speed to 115200 (use the instructions given earlier, just replace 9600 with 115200).
When you have the console software running, turn on your Firebox, and a boot screen, similar to that on a 1990s PC, will open. As soon as you see it, press Tab or Del (Del may not always work, so we prefer to stick to Tab) to enter the BIOS. Use arrow keys to navigate and Enter to make choices.
Go to Standard CMOS Features. Find the IDE Master 0 setting and change it to Manual; then, change Access Mode to CHS. Use the Esc key to return to the main BIOS screen.
Optionally, you can also go to PC Health Status and adjust the default fan speed (out of the box, it’s set to the maximum possible value, FF, but you can change it to something like BB. Again, use the Esc key to return to the main BIOS screen.
On the main screen, do Exit and Save. This should start the boot-up sequence you’ve seen before. Wait for the boot to complete, then turn off your Firebox; Part One is done.
Part Two: OpenWrt
Head to OpenWrt downloads site:
https://downloads.openwrt.org/
Find the Stable Release section and click on the version number (as of this writing, 21.02.3). Scroll toward the bottom of the page and click on x86 (this is the architecture we’re working with). Then, click on generic. From there, download your installation image. We downloaded generic-squashfs-combined.img.gz, but it’s possible that generic-ext4-combined.img.gz might have been a better idea (we’ll explain why a little later).
Don’t leave the site just yet. You’ll need a package that is not included in your image, but will be essential to making your Firebox work. Scroll down the page and click on packages. There will be a long list; find the package whose name starts with kmod-skge (in our case, it was kmod-skge_5.4.188-1_i386_pentium4.ipk) and download it.
Next, make a bootable CF card from the image (same idea as before; We used Rufus, but it's not the only game in town) and copy the kmod-skge package anywhere on that card. And this is when our possible minor mistake became obvious. A bootable CF card for OpenWrt includes two partitions. One of them, the boot partition, is an ext2 partition no matter what. The other, the root partition, can be either squashfs or ext4. We downloaded the squashfs version of the image, so the computer we were using couldn’t write anything onto the root partition. So we had to copy the package onto the boot partition, next to grub files. Not the end of the world, but not the cleanest behavior, either. The good news is, it’s only temporary; we’ll delete it later. Had we used the ext4 version of the boot image, we probably wouldn’t have this issue.
Note
We are not sure whether writing to an ext2 or ext4 partition can be done on Windows. We made the bootable CF card on a Windows machine using Rufus, then wrote the package file onto the boot partition on a Linux machine.
Anyway, time to actually install OpenWrt. Install the CF card into your Firebox, initiate a connection at 38400 speed (by now you should need no additional explanations on how this is done), and turn on the Firebox. If everything went well, you will see the familiar OpenWrt start-up output. At one point, there will be a message saying, Press Enter to activate the console. When you see it, do as requested; this will give you access to OpenWrt’s command-line management console.
To remind, the default user name for OpenWrt administrative user is root with empty password. You should set the password when you get around to it. If you want to do this right now, type passwd in the command line and follow the prompts.
At this stage, none of your networking is operational. This is why you need that kmod-skge package. Using the cd command, navigate to the directory where you put the package. Once there, type:
opkg install kmod-skgeand press Tab; the system will complete the package file name for you. Hit Enter, and installation will commence. OpenWrt will then attempt to define a sensible (in its opinion) network setup. In our case, eth0 (marked 0 on the device's case) was designated as the WAN port expecting a DHCP connection to the upstream device, while eth1, eth2, and eth3 (marked 1, 2, and 3 on the case) were bridged into a single LAN with DHCP server and default gateway at 192.168.1.1.
This setup may not be what you had in mind for your Firebox, so go have fun with network settings. There are plenty of tutorials about that.
Note that right now, the Firebox is about half-operational; ports 0 though 3 work, but ports 4 through 7 do not. This is because this model has two network interface cards (NICs). One of them is built into the motherboard; it requires the kmod-skge package to work. The other one is a PCI expansion card. But we’ll need Internet access to deal with it. So go set up your first four ports (actually, two will be enough, one for LAN, one for WAN) and return when you’re done.
The Other NIC
At this point, your Firebox should be connected to the Internet and you should be able to connect to your Firebox via LAN, so we’re no longer using the console cable. Your Firebox has a local IP address, and you can access it using SSH (by default, it's ssh root@192.168.1.1). You probably used LuCI (the Web-based administration interface), too. So let’s figure out this second NIC business.
Normally, we would start with the lspci command; it provides a listing of all PCI devices available on the system. However, when you type this command, you get an error message. This is because in OpenWrt, this command is not included in the minimal system. Instead, it is a part of a package called pciutils (it probably stands for “PCI utilities”). Let’s install it now:
opkg update && opkg install pciutilsNote that since we just started the router, we have to do opkg update before we ask opkg to do anything else. This will tell opkg to go online and make an inventory of all packages available for download.
Now we have a way to look under the hood of the Firebox. Let’s do this:
lspci -nnToo much stuff onscreen? No problem; let’s show only what’s relevant to networking:
lspci -nn | grep EthernetThis produced eight long lines of descriptions. Four of them referred to Marvell Technology Group Ltd. 88E8053 PCI-E Gigabit Ethernet Controller [11ab:4362] (rev 19), the other four, to Marvell Technology Group Ltd. 88E8001 Gigabit Ethernet Controller [11ab:4320] (rev 13). Since the first description mentions PCI-E and the second doesn’t, we concluded that the first description refers to the PCI expansion card, while the second identifies the NIC integrated into the motherboard.
Time for a quick trip to Hardware for Linux:
https://linux-hardware.org/?id=pci:11ab-4362
Note the ending of the URL: this is the NIC’s PCI identifier (11ab:4362), except the colon is replaced with a dash. This page contains references to a driver called sky2. That definitely rings a bell; there is an OpenWrt package called kmod-sky2 (incidentally, kmod stands for “kernel module”; a kernel module is a piece of software that must be present at boot in order for a system device to be working). A quick Google search, and bingo! — kmod-sky2 is in fact a driver for a bunch of Marvell NICs, including the 88E8053. So let’s install it:
opkg install kmod-sky2If opkg refuses to work and exits with an error, this is probably because it doesn't know where to get the packages identified only by name. Run opkg update; this will tell opkg to go online and grab a lost of packages available for download. Then, try the installation command again — it should work this time.
After the installation is finished, you can type ip a to see all eight of your Ethernet ports, from eth0 to eth7, listed. Just like before, you should set up those ports the way you see fit.
Minor Housekeeping Tasks
At this point, we have a working eight-port Gigabit router and may well stop here. The perfectionists, however, will note that we have the red Arm/Disarm light permanently on, while the LCD screen next to it is stuck on Booting OS...
We were unable to do anything about the indicator light, but the LCD turned out to be manageable. First, we need to install the relevant packages:
opkg install lcdproc-server lcdproc-clients lcdproc-driversWe were able to install the packages without a problem, but then, something strange happened. OpenWrt correctly determined that it needs the LCD driver called sdeclcd and wrote a valid configuration for that driver. However, the packages did not include the actual driver, a file named sdeclcd.so, to be placed in /usr/lib/lcdproc/.
Luckily, some other nice (and technically adept) person made the driver available:
http://mattventura.net/stuff/sdeclcd.so
After downloading, we copied the sdeclcd.so into /usr/lib/lcdproc/ and made sure that the file’s owner is root:root and permissions are 0755. After installation, we uncommented Hello and Goodbye lines in /etc/LCDd.conf (just to have something working).
There’s probably a way to restart a service or two to make the LCD start working, but we were too impatient to figure this out and just rebooted the whole device. The result was immediately gratifying:
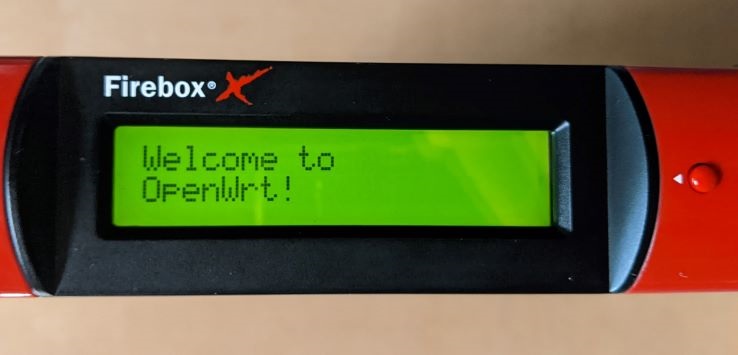
We believe there are additional configuration settings that can be employed here, but we didn't explore further and left the LCD at its default settings.